Saturday, November 7, 2009

cake balls...

Hello blogger friends and blog readers (if I have any left)!
I truly have not dropped off the planet.

As much as I love blogging, I just simply don't have
enough hours in my day to do it as much as I would like.

Yes, it disappoints me... but I have something else
much more precious that occupies my every waking hour!

He'll be a year old in a few weeks... I can't believe it!

Oh, wait! This blog post is titled "cake balls"...
I'm sorry. See what I mean? My every waking hour!

Now lets see... I made these little round cake things last weekend
for my daughter and her friends Halloween party. I posted a few
pics of them on my facebook page and got a huge demand for the recipe.
I tried to explain in a "comment" box, but it's kinda hard without pictures.
Which is what brings me here today... So, here goes!

*Cake Balls*

You're gonna need-

*A box of your favorite cake mix... I like red velvet!
*A can of your favorite frosting (not the whipped kind)... I like cream cheese!
*Almond Bark... there's a pic of it below.

OK... lets make some cake balls!

Open and prepare your cake according to the box directions.


Bake it according to what type of pan you use.
No special tricks here!


Let it cool to room temp.
I use a fork and poke a bunch of holes
in it to help it cool faster.


After it's cooled, take your fork and start
breaking/crumbling the cake until the whole
cakes looks like this.
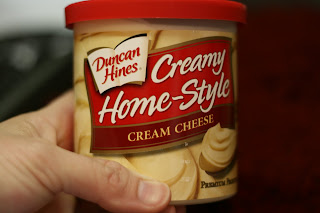


Take your frosting. Open it.
Take a little taste... just to make sure it's good!


After you preform the "quality taste test",
drop by spoonfuls onto the crumbled cake.


Mix it altogether.

This can take a little bit of gentle hand mixing...


You want it to look like this!


OK... here's trick # 1!

After you get the frosting worked into the cake,
pop it in the freezer on top of the Totino's Pizzas.

Then feed your baby his lunch, give your baby a bath
(because he's now covered in food and has mashed it in his ears),
run the vacuum and take a quick shower yourself!

After about an hour you'll remember you were doing something.

Oh yeah... CAKE BALLS!

Don't panic... it's OK!

Take the cake mixture out of the freezer.

See, it's ok.

Lay down some wax paper.


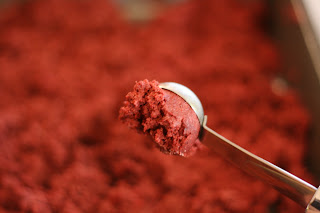
Trick # 2... Melon Baller!


Scoop...

Transfer to your hands...


And roll into little balls... ahh perfect!

The cake is better to work with when it's cold.


When your hands start looking like this,
the cake is getting too warm and soft.

Time to pop it back in the freezer for about 10 to 15 min.


Ahhh... much better. This is after about 6 or 7 balls.

Keep doing this until you're done.

One box of cake mix will make about 60 to 65 cake balls.

I didn't get a picture of the finished rolled balls.
Something about having to clean up... well, you don't want to know.

After you get all the cake rolled into balls, pop them back in the freezer.
Then, change your baby's, scoop out the cat box, wash your hands, take
a couple of heartburn meds, and dry your hair!


Now, open up the Almond Bark.


Break apart about half of it into a microwave safe bowl.


Melt, stir, melt, stir...


Toss about 3 to 4 cake balls into the melted Almond Bark.

Coat them completely...

You'll have to work at a fast pace before the chocolate sets.
I used two spoons and transferred the cake ball back and forth.

After it's coated, set it on the wax paper.

This might be a good time to sprinkle on
some sprinkles or some kind of decoration.
That is, if you want.

They set up quickly.

YUM... Cake Balls!

Enjoy!
xo
Rolo

Tuesday, September 22, 2009

chicken parmigiana...

These pictures don't even do this dish justice.

Lighting is a problem for me in the kitchen
after the sun has gone down.
That, and well, maybe... a couple glasses of wine.
Nahh, it couldn't be the WINE! Never.

Any who, this is super easy to make and just like Alfonso's!

"Who's Alfonso", you ask? Oh, only just the best little
Italian restaurant in my part of the world.
No, really... maybe it's not "just like" Alfonso's...
but it's close!

Before I give you the recipe, can I just say,
I really hate how this picture came out...
I'm still learning about photography.
Cut me some slack.

*Chicken Parmigiana*

4 boneless, skinless chicken breasts
1 cup Italian seasoned breadcrumbs
1/2 cup grated Parmesan cheese
2 large eggs, lightly beaten
4 Tbsp. butter
1/4 cup olive oil
1 jar of your favorite spaghetti sauce
1 cup shredded mozzarella cheese

Preheat
oven to 375 degrees.
Prepare
your chicken by trimming and
pounding it to about 1/4 -inch thickness.
Combine
the breadcrumbs and Parmesan cheese.
Coat chicken with breadcrumb mixture then dip
in egg
and
dredge
in breadcrumb mixture again.
Melt
butter and olive oil together in large skillet over medium-high heat.
Add
chicken and brown on each side.
Pour
about 1/4 of the spaghetti sauce in a lightly greased baking pan.
Arrange
chicken in pan after it's browned.
Pour
remaining spaghetti sauce over chicken.
Sprinkle
with mozzarella cheese.
Cover
and bake for about 20 to 30 minutes
or until thoroughly heated.
Serve over angel hair pasta
with a green salad and your favorite garlic rolls.

Enjoy!

Saturday, September 19, 2009

light fluffy pancakes...

Yum!
That's about all I can say about these
made-from-a-box-mix babies.

Oh yeah... Plus, they're super easy to
whip up on a Saturday morning!


Here's the secret ingredients I added to make
them light, fluffy (because my ordinary pancakes
always seem to be flat and cardboard like... it's true!)
and oh so mm-mmm.


I like to top mine with butter, syrup
and a dollop of strawberry preserves or fresh fruit.

*Fluffy Pancakes*
2 cups Aunt Jamima Buttermilk Pancake Mix
1 cup water
1/4 sour cream
2 Tbsp. vanilla

~Stir ingredients together until blended... don't over mix.
~Makes about 6 to 8 nice size pancakes.

Now, go forth and whip up a batch of these babies tomorrow morning.
Enjoy Life!

Monday, September 14, 2009

the prettiest thing...

Isn't this the prettiest thing you've ever seen?

I'm in love.

She sits on top of my stove because I don't have the heart
to hide her away in a dark cold cabinet.
I polish her everyday, carefully inspecting her for scratches or chips.

She is my new best friend.
I think we're going to have a long lovely life together.


I also think I need to get out more...

Sunday, September 6, 2009

just playin' around...

I know, I know... things look a little different.
I've been wanting to change my blog for sometime now.

Nothing is permanent so far... I'm just trying a few things out.

So, please bear with me until I get back into the swing of things.

Thanks so much!
xo
Ralonda

Friday, September 4, 2009

crock pot lasagna...

Don't you just love the easy button?

For me, the easy button is the dial on my crock pot.

And I had to use it a few nights ago.

I know crock pot dishes generally aren't very pretty...
and this is no exception. I'm sorry, but I just had to share.


*Crock Pot Lasagna*

1 lb. ground beef
1 jar spaghetti sauce
1 cup water
1 container (15 oz) ricotta cheese
1 pkg. shredded mozzarella cheese
1/4 cup grated parmesan cheese
1 egg
2 Tbsp. chopped fresh parsley
6 lasagna noodles, uncooked

~Brown
meat in large skillet; drain.
~Stir in spaghetti sauce and water.
~Mix ricotta, 1 1/2 cups mozzarella, 2 Tbsp. parmesan,
egg and parsley.
~Spoon 1 cup meat sauce into your crock pot; top with layers
of half each of the noodles, broken to fit, and cheese mixture.
Cover with 2 cups meat sauce, noodles and cheese mixture,
ending with remaining meat sauce.
~Cover with lid and and cook on LOW 4 to 6 hours or until
liquid is absorbed.
~Sprinkle with remaining cheeses; let stand covered, 10 minutes,
or until melted...

Enjoy!

xo
Ralonda

Friday, August 28, 2009

lots of lemonade and the big four-O...

I turn 40 today.

And it seems like I've been "makin' lemonade" my whole life...

With this summer as no exception.

Except for one thing...


I finally got smart and started adding a little vodka!


*Vodka Lemonade*

5 whole lemons
2 cups sugar
2 cups water
Vodka
Club Soda

~Peel large sections of lemon peel from the lemons
until you have about 8 large sections.
~In a sauce pot, bring the sugar, water and lemon peels
to a boil until the sugar is dissolved.
~Remove from heat and cool to room temp.
~When cool, strain and discard the lemon peel.
~Cut each of the lemons in half (the same ones that we peeled)
and squeeze the juice (minus the seeds) into the lemon syrup.

*To make the cocktail...*
~Put ice in your favorite glass.
~Add an ounce of vodka... or a bit more!

~Fill with the lemonade syrup.
~Add a splash of Club Soda.
~Garnish w/ a lemon wedge.
Enjoy!

Happy Birthday to me...
It's been a hell of a summer!
xo
Ralonda

Wednesday, July 8, 2009

please stand by...

Please Stand By...

Sometimes life throws you a curve ball... or two, or three, or four.

Sometimes life gives you lemons... a whole truckload of 'em.

Please stand by while I practice up on my batting skills
and round up about 100 pounds of sugar!

After all, hitting a home run and making the perfect pitcher
of lemonade takes some time and skill.

Be back soon!

xo
Ralonda

Tuesday, May 19, 2009

haley's strawberry cream cake...

This one turned 13 this past Saturday...
Why is she dressed up like an "Uber" cat you ask?
I'll share more on that later!

First, I want to share

this with you!

She (my "Uber" cat) requested a strawberry cake
for her birthday... and for a split second time stood still.
I began to have flashbacks of this time last year when she
requested the same thing. It was a typical hot and humid
Dallas day in May. I was not quite three months pregnant and
smack dab in the middle of morning sickness... yuck!
I had flashbacks of me pulling it together long enough to make phone
calls and run all over town trying to find my baby girl the strawberry cake
she wanted for her 12th birthday. Finally, with no luck, I settled
on some sort of fancy chocolate thing from Central Market.
She said it was ok.


That is... until this year when asked, "What kind of cake do you want"?
And with no hesitation the reply was, "Strawberry"!
And that's when I started having flashbacks of this time last year...
Wait!? Didn't I already say that? Oh yeah... sorry!


So, after finding several strawberry cake recipes on
the internet that sounded good, I decided to do a little combining
and add a few of my own ideas. Basically, I was throwing
caution to the wind and hoping for the best...
but first, I needed some coffee and an open Saturday morning.
Lucky for her, I had both!


Yes, this is sifted flour...
and just so you know, if I sift for you... I love you!

I'm just sayin'... it is what it is!


Here's what you'll need for the cake...

*Haley's Strawberry Cream Cake*

1 cup butter, softened
2 cups sugar
3 cups sifted Cake flour
3 teaspoons baking powder
1/2 teaspoon salt
4 eggs
1/2 cup milk
1/2 cup plain or vanilla yogurt
1 teaspoon vanilla extract
3 teaspoons strawberry extract
1 cup strawberry preserves


Here's what you'll need for the in-between filling...

1 pound of strawberries, stemmed
1/2 cup sugar


Here's what you'll need for the frosting...

8 ounces cream cheese, room temperature
2 sticks unsalted butter, room temperature
16 ounces powered sugar
1 teaspoon vanilla
4 teaspoons strawberry extract

~ Preheat oven to 350 degrees F.
~ Butter and flour two 9 inch cake pans.
(Sorry, no picture of this step.)
(Oh, and let me apologize before we get started...
this is an unusually long post but I wanted to
give it to you step by step for this cake.)


~ In a mixing bowl, cream butter and gradually add sugar
creaming until light and fluffy.


~ Add eggs one a a time, beating well after each addition.

~ In another bowl, combine the sifted flour, baking powder and salt.

(Sorry, no picture for this step either.)

~ Add flour mixture alternately with milk, yogurt and flavorings
to creamed mixture, beating after each addition until smooth...


Here's an example for you...

Add flour mixture to creamed butter and sugar. Blend well.
Add milk. Blend well.
Add four. Blend.
Add yogurt. Blend.
Add more flour. Blend.
Add vanilla with a little milk. Blend well.
Add a little more flour. Blend.


Add strawberry extract. Blend.
Add more milk or yogurt. Blend. I'm sure you get the picture...


Add the preserves with the remaining milk or yogurt or flour,
whatever is left and... you know!


~ Pour batter into cake pans.
~ Bake for 30 to 35 minutes, until center is set.


~ Cool 10 minutes. Remove to cooling rack.


While the cakes are baking go ahead and prep the strawberry filling...

~ Stem and wash one pound of strawberries.


~ Sprinkle with 1/4 cup of sugar and mix well.
~ Let set for about 30 minutes.
~ Mash strawberries with fork and sprinkle with other 1/4 cup sugar.
~ Let set for another 20 minutes or more.


Make the frosting...

~ Combine cream cheese and butter in a
medium mixing bowl until creamy.


~ Slowly add powdered sugar, vanilla and strawberry
extract until very light and fluffy.


~ Spread the strawberry and sugar filling mixture
over the tops of each of the cakes.
~ Put in freezer for about 5 minutes to let set...
just to make the frosting go smoother.


~ Frost the top of the first layer.


~ Stack the second layer on and continue frosting until finished.


Enjoy!


I mean, you're gonna really enjoy this one!
It's SO worth the time and effort... I promise!

xo
Ralonda